After buying and programming a few GM300 a few weeks ago, I now picked up a poorly looking – but working – GM950. There is very little written about these devices and how to program them on modern computers. So I spend some time to figure it out. Now I am going to tell you how to do it.
First you need a few things. Mainly the CPS software, a cable and Dosbox with Windows 3.1. But don’t worry we will walk through everything now so it is easy to understand.
The Cable
The first thing which I was looking into was the original wiring for these old Motorola RIBs (Radio Interface Box). You can find a lot of schematics online, but you need to combine them to get the big picture. What I found out is pictured below. If you read my article about GM300 programming you will notice that the cable is very similar. Pin 2 (BUS+) and 5 (GND) match the GM300 cable.
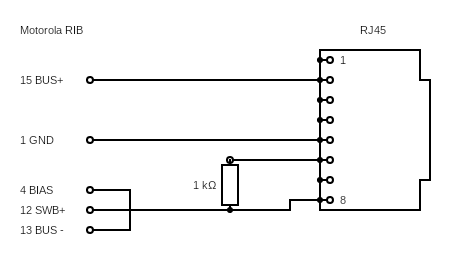
Pin 6 and 8 are new here. I assume they are some sort of HI / power pins which you can see in a bunch of other Motorola / FTDI based schematics. Not sure about this but if you want to build a cable on your own it might be interesting to look into this. The most important lines BUS+ and GND are the same.
This time I went an easier route. I got lucky and found a MaxtonData (RPC-MM-U) USB cable in one of my boxes. I originally bought it for my GM300 devices. It never worked for the GM300, but it works like a charm on the GM950. If you are looking for one, try it via Amazon, AliExpress or eBay. You can get them for a few bucks.

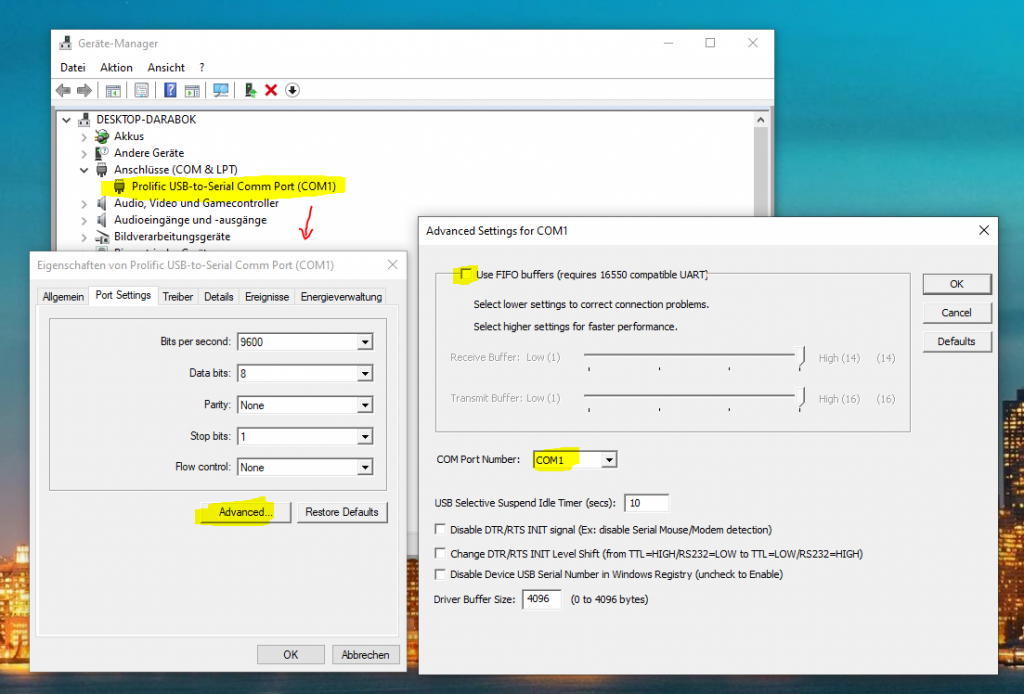
Once you have obtained the cable, plug it in and make a few changes to the device. Go to the Windows Controlpanel -> System -> Device Manager. Locate the COM & LPT entry and double click on the device.
First change the COM Port Number to COM1. If COM1 is in use at the moment use another COM port. Make sure to adjust the Dosbox config below as well if you use a different port.
Also make sure that the FIFO buffer is off. Click ok – and you are done with the cable config.
Software Environment
After clearing the cable situation, let’s setup the software. You need to find a few things:
- A copy of the Motorola RSS programming software for the GM950. This is easy just google for it, but watch out for malware!
- A default installation of Dosbox
- A copy of Windows 3.1 or 3.11. The abandon ware scene offers premade Windows 3.1 packs you can right drop into your Dosbox path. If you want to install it yourself use this guide.
The first thing you need to do is install Dosbox. After the installation located the configuration file and make the following changes to it.
The first change is in the [cpu] region. Use the settings below to make sure the Dosbox is not ticking to fast:
core=normal
cputype=pentium_slow
cycles=fixed 2500
cycleup=10
cycledown=20
You also need to make some changes in the [serial] section of the config:
serial1=directserial realport:COM1 rxdelay=100
serial2=dummy
serial3=disabled
serial4=disabled
The last thing you need to adjust is the [autoexec] section. I have a general working directory for HAM stuff at C:\work\Afu, change this path to match your environment or nothing will work.
MOUNT c C:\work\Afu\Windows3 # location of my Windows Installation
MOUNT a C:\work\Afu\Motorola\gm950 -t floppy # mount the directory with the installer
Windows 3.1
The next step is to get Windows 3.1 working in your newly installed Dosbox. If you downloaded a Windows 3.1 packed install just unpack it at the path above. In my case C:\work\Afu\Windows3. Make sure the packer is not putting the files in a sub directory. The path will serve as root for the C: drive in Dosbox and the Windows install needs to be in the root folder of the future C: drive.
Back in the days Windows 3.1 wasn’t the operating system. It was just a GUI on top of MS-DOS. That is why we need to run it first. Start Dosbox, change to the C: drive by simply typing C: . If you have a packed install you most likely have a WINDOWS.bat which you can launch to start windows. Running a .bat (Batch file) is as simple as you can imagine, just type the filename and hit enter.
If you want to list the files in the current directory type dir. In case you installed Windows on your own the startup might be different.
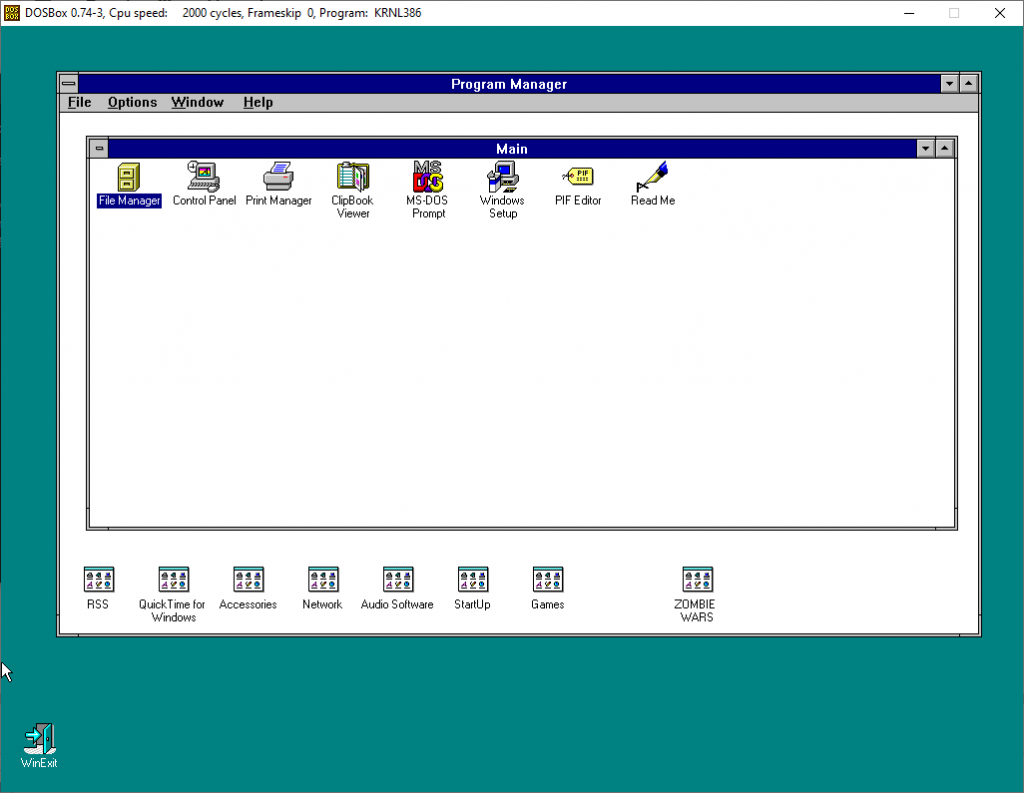
Ok, at this point you should have a working Windows 3.1. Now we are ready to install the Software!
Installing the CPS
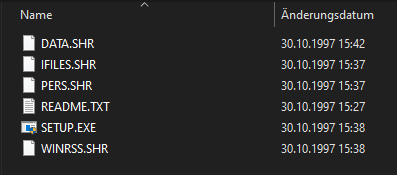
Ok, let’s get the last part done. If you downloaded the Motorola RSS you will find two folders in the archive. One is called disc1 and another one disc2 (or similar). The trick is to copy the files from both folders together in the folder you previously designated as A drive in the config. In my case above C:\work\Afu\Motorola\gm950.
The result should look like on the picture below. Again, don’t copy the disc1 and disc2 folder, copy the files inside them!
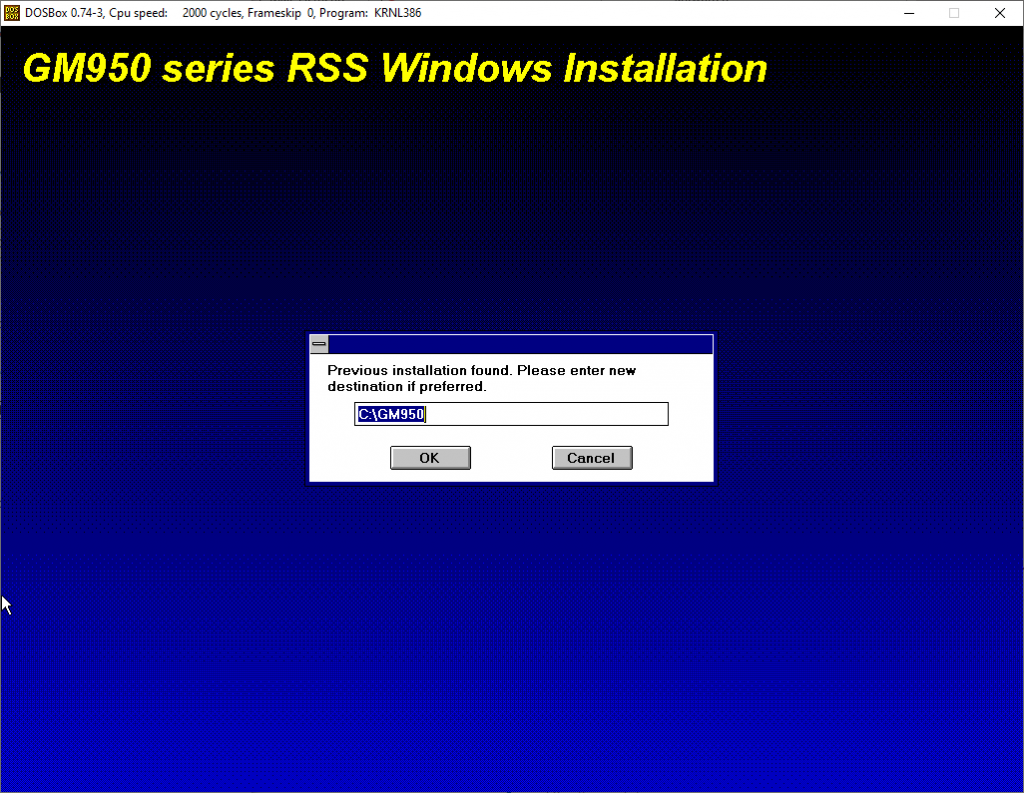
Now restart the Dosbox and run Windows again. Sadly the A: drive isn’t showing up in Windows correctly, so launching the installer is a bit more tricky. In the Program Manager click File -> Run , in the box type a:\setup.exe and press enter.
The installer should load. If not or the file is not found, check your Dosbox config and if A: is present with the installer files in it.
That’s pretty much it, once installed the software a new group in Program Manger with a single icon appears. That is the icon to start RSS.
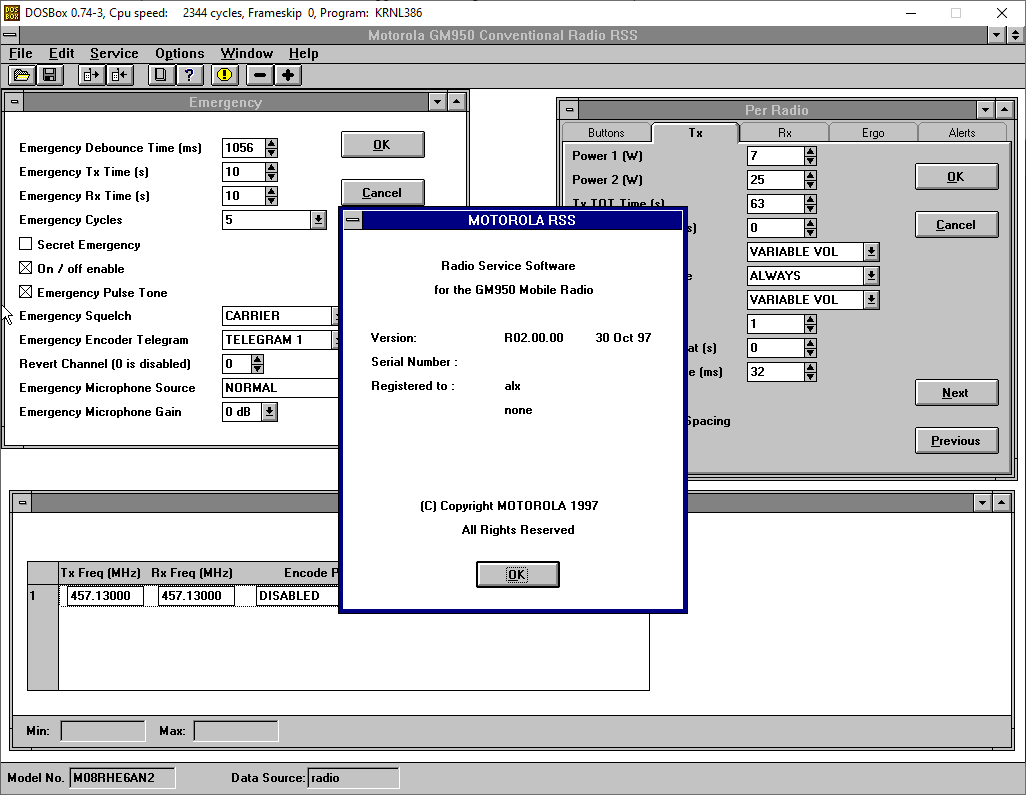
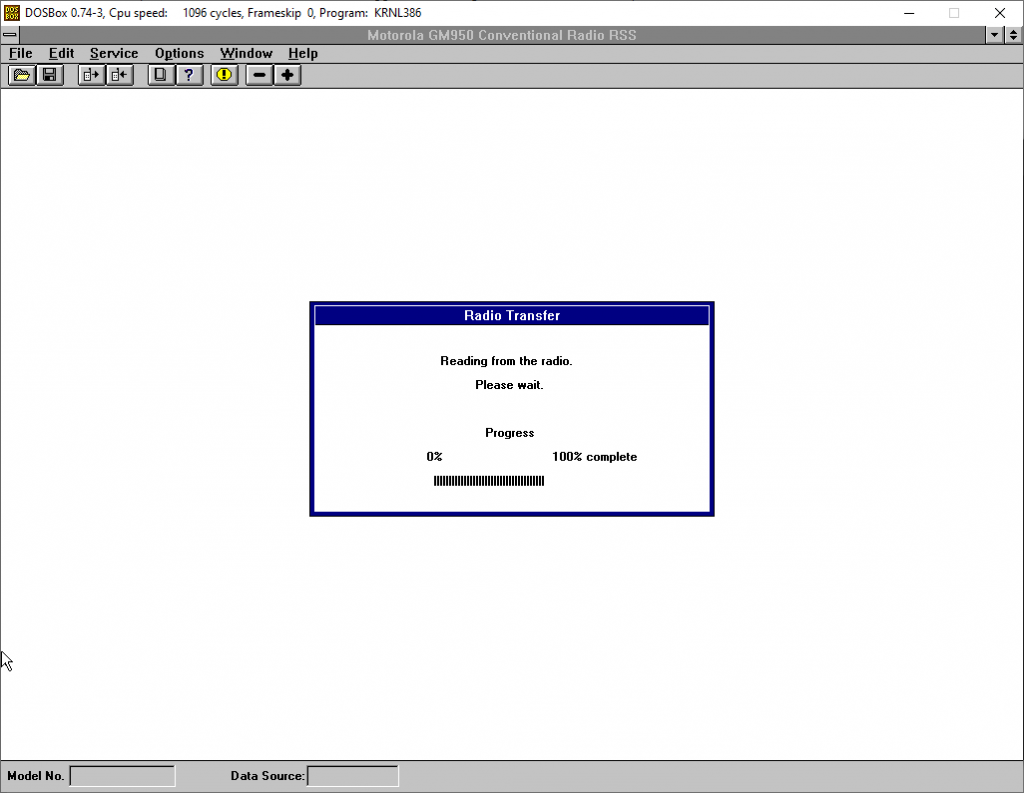
Reading the Device
Reading the device should be working now. Sometimes the RSS hangs a bit on startup, disconnect the RJ45 connector from the device and plug it back in once it is responding again. Don’t unplug the USB end or you need to restart Dosbox.
Reading and writing should work now and the process is pretty straight forward. Have a lot of fun now programming your GM950!
I hope you enjoyed the article, feel free to leave me a comment if something is unclear. Thanks for reading!
we are unable to launch A: drive suggest us
Please follow the guide, there is a hint about this:
Now restart the Dosbox and run Windows again. Sadly the A: drive isn’t showing up in Windows correctly, so launching the installer is a bit more tricky. In the Program Manager click File -> Run , in the box type a:\setup.exe and press enter.
Moin Alex,
das mit LW A:\ funzt nicht wirklich.
Ich bekomme auch kein virtuelles LW A gemountet.
Wie bekomme ich die SW trotzdem zum laufen?
Sitze schon seit Freitag an diesem Problem. 🙁
73&55 Roy
Hallo Roy!
MOUNT a C:\work\Afu\Motorola\gm950 -t floppy # mount the directory with the installer
Diese Zeile mountet quasi die Ordner “C:\work\Afu\Motorola\gm950” auf meinem system als Laufwerk A: vom typ “floppy”. Wenn es bei dir nicht geht, fehlt die Zeile in deiner Config oder hast du eventuell irgend ein Tippfehler im Pfad? Bitte schau auch das der Ordner genau so bei dir existiert. Du kannst auch jeden anderen Pfad nehmen, solang es ihn auf deinem System gibt.
73 Alx
merci, hat gefunzt. Ich stand auf dem Schlauch. 😉
hallo Alex
alles funtioniert aber ich stecke beim 1750hz ton
könntest du das bitte auch zeigen oder mir eine cps senden wo ich abschauen kann?
danke Roland
Halloich habe hier ein GM950 das beim flashen abgestürtzt ist
Gibt es da Hoffnung ?
Das letzte was es sagt ist : EEProm/ROM fail
tengo un radio motorola gm950 pero me hacfalta el cps para poderlo programar estare atentogracias
If people would like a copy of the two disks, I can provide these by mail.
Does anybody know how to hard reset a GM950? ONe is completely lost it’s mind and I have to factory reset it. Thanks in advance.
Viel zu kompliziert das ganze mit DOSBOX und win3.11…..
Nehmt doch einfach ein normales win7 32bit und gut ist 🤦♂️
Geht 1A im Komp. Modus.
Mit einer Dosbox wird das ganze nur zur Weltraumstation die man sich sparen kann ….
Lg aus AT 🙋♂️
gm-950 Please send me the program file and user manual.